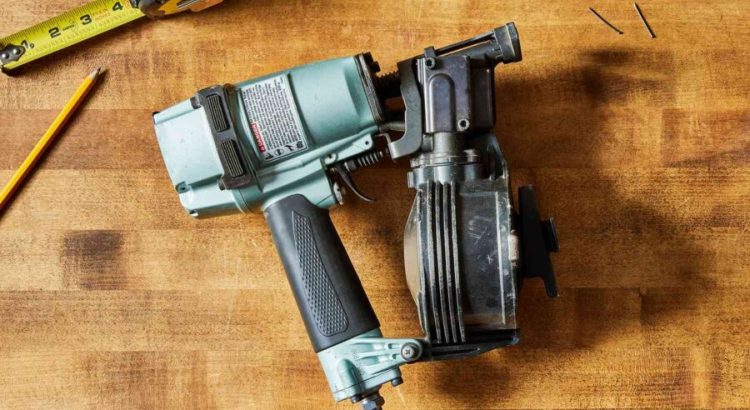
A construction project moves through distinct phases, each with its own technical demands and tolerance for error. The tools that serve a framer well are rarely the same ones that serve a roofer or a finish carpenter. Recognizing those differences—and building a tool selection around them—is one of the defining habits of professionals who consistently deliver high-quality work. From heavy structural assemblies to the delicate work of installing finish trim, nail guns play a central role across the construction spectrum. This guide examines how each nailer type fits within the broader construction workflow and identifies the practical considerations that lead to smart, durable tool investments.
Why Construction Phases Demand Different Nailers
The physical demands of framing, roofing, and trim installation vary enormously. Framing involves driving thick nails through dense lumber under physical strain. Roofing requires rapid, repetitive fastening at height in variable weather. Trim work calls for precise, surface-conscious fastening on finished materials.
Each phase presents a distinct combination of material type, fastener size, working environment, and precision requirement. A single nailer cannot optimally serve all three without significant compromise. Professionals who recognize this invest in purpose-built tools for each phase rather than attempting to adapt one tool across all applications.
Framing Nailers in the Construction Workflow
Framing marks the earliest structural phase of most building projects. Wall assemblies, floor systems, and roof structures all take shape during this stage, and the framing nailer is the tool that holds it all together.
Speed and Volume in Framing Applications
Framing nailers are optimized for speed and volume. On large residential framing projects, operators drive hundreds—or thousands—of nails in a single workday. Tools that slow down due to jams, reloading delays, or inconsistent power become significant productivity liabilities.
High-capacity stick magazines reduce reloading frequency. Reliable jam-clearing mechanisms minimize downtime. Consistent drive power ensures each nail is set correctly without requiring additional hammer strikes or manual corrections. These aren’t convenience features—they’re production necessities.
Structural Code Compliance
Structural framing in most jurisdictions is governed by specific fastener requirements. These requirements typically specify nail diameter, length, head type, and in some cases, the angle of installation. Using a nailer that accepts compliant fasteners—and verifying this before purchase rather than after—prevents compliance issues that can result in costly rework.
Roofing Nailers in the Construction Workflow
Once the structural frame is complete and sheathing is installed, roofing begins. This phase involves working at height, often under direct sun exposure, with the pressure of weather windows that limit how long a roof can remain unprotected.
Productivity Under Pressure
Roofing is a phase where production speed directly affects project risk. A partially roofed structure is vulnerable to weather damage, and delays extend that vulnerability. Roofing nailers with high-capacity coil magazines and reliable bump-fire triggers help crews work at the pace the situation demands.
The sheer number of fasteners involved in roofing a typical home makes this point concrete. Starter strips, felt underlayment, and each course of shingles all require nailing. Tools that keep pace with this demand without constant interruptions are not a luxury—they’re a professional requirement.
Fastener Depth in Roofing: The Hidden Quality Factor
Fastener depth in roofing is one of the most overlooked quality factors among less experienced installers. Nails driven too shallow create raised heads that puncture overlying shingles and allow moisture intrusion. Nails driven too deep break through the shingle surface and reduce holding strength. Both conditions create callbacks and potential warranty disputes.
Quality roofing nailers with precise, tool-free depth-of-drive adjustment allow installers to dial in the correct depth at the start of each section and recalibrate quickly when material conditions change. This level of control is what separates professional roofing work from work that generates post-installation problems.
Trim and Finish Nailers in the Construction Workflow
The final interior phase—trim installation—transforms a structurally complete building into a finished, habitable space. This phase is visible to everyone who occupies the building, and the quality of the work is apparent to even untrained observers.
The Relationship Between Nailer Selection and Surface Quality
Surface quality in trim work is directly influenced by the gauge of nail being driven. Thicker nails leave larger holes that require more filler and create greater risk of wood splitting, particularly near the ends of trim pieces. Thinner nails leave smaller holes but offer reduced holding strength.
The practical solution for most trim installations is to match the gauge to the weight and length of the trim piece, using the thinnest nail that provides adequate hold. For baseboards and casing, that typically means a 15- or 16-gauge finish nail. For lighter decorative elements, an 18-gauge brad nail is usually sufficient.
Overhead and Corner Trim Challenges
Some of the most technically demanding trim work involves installation at height—crown molding being the most notable example. Nailers used for overhead work should be as light as possible without sacrificing build quality. Extended overhead nailing with a heavy tool creates fatigue quickly, which affects accuracy and increases the risk of tool drops.
Angled magazine designs on finish nailers also matter for crown molding installation, where access to corner areas and ceiling junctions requires a tool that fits into constrained spaces without the body interfering with placement.
Building a Complete Nailer Toolkit
A complete professional toolkit typically includes a framing nailer, a roofing nailer, a finish nailer, and a brad nailer—each purpose-built for its specific application. This approach may seem like a greater upfront investment, but the productivity gains and quality improvements across projects more than offset the initial cost.
Professionals who rely on a single versatile nailer for all applications consistently face situations where that tool’s limitations show up in the finished product. The frame that required extra time to drive nails correctly, the roof with inconsistent fastener depth, the trim with visible surface damage—these are the consequences of mismatched tools.
Investing in the Right Foundation
Construction quality is built on a series of decisions, and tool selection is among the most consequential. Nailers matched to their intended applications drive productivity, protect material integrity, and support the kind of professional output that builds lasting reputations in the trades. Approaching each phase of construction with the appropriate tool is the foundation that makes everything else possible.